

Step 1: Create a SAML app in Okta
- Create a SAML app using Okta’s guide.
- Get your
TENANT_IDfrom your IrisAgent point of contact, then set:- Single sign-on URL:
https://frontend-api-server-v2.api.irisagent.com/oauth/okta/TENANT_ID/saml/acs - Audience URI (SP Entity ID):
https://frontend-api-server-v2.api.irisagent.com/oauth/okta/TENANT_ID/saml/metadata - Attribute Statements:
email:user.emailname:user.firstName + " " + user.lastName
- Single sign-on URL:
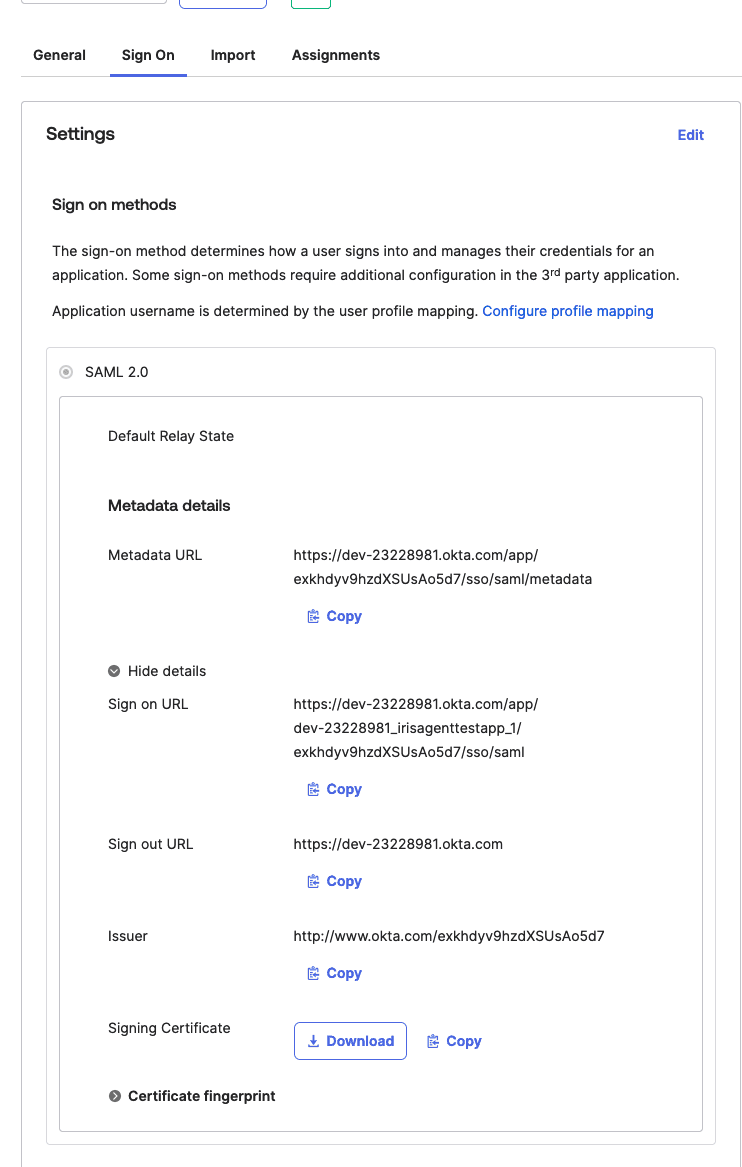
Step 2: Send the metadata to IrisAgent
Send your IrisAgent contact the app’s Metadata URL and Issuer.Step 3: Connect your ticketing system
A user withwrite access in your ticketing system (for example, Zendesk) connects it to IrisAgent. Make sure this user is assigned to the IrisAgent SAML app in Okta.