Introduction
IrisAgent AI can answer customer queries right within your Intercom chatbot seamlessly using webhooks. This guide will help you integrate IrisAgent with your Intercom chatbot.
Intercom App Configuration
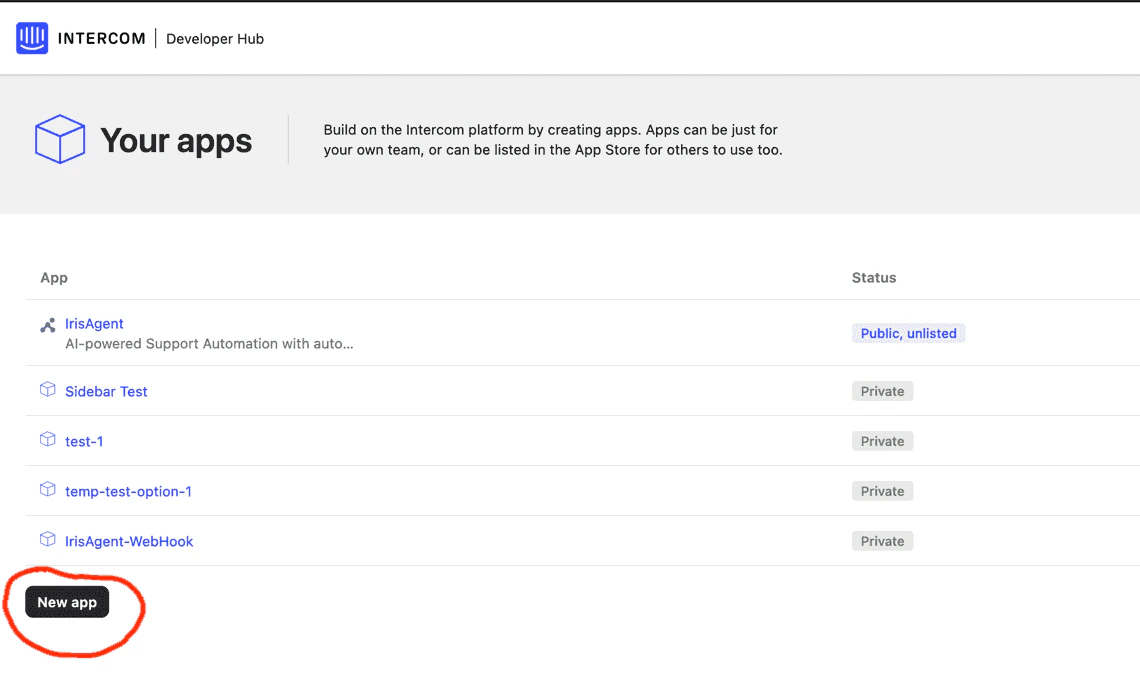
Step 1: Create a New Private App
- Navigate to the Developer Hub.
-
Select the option to create a new private app.
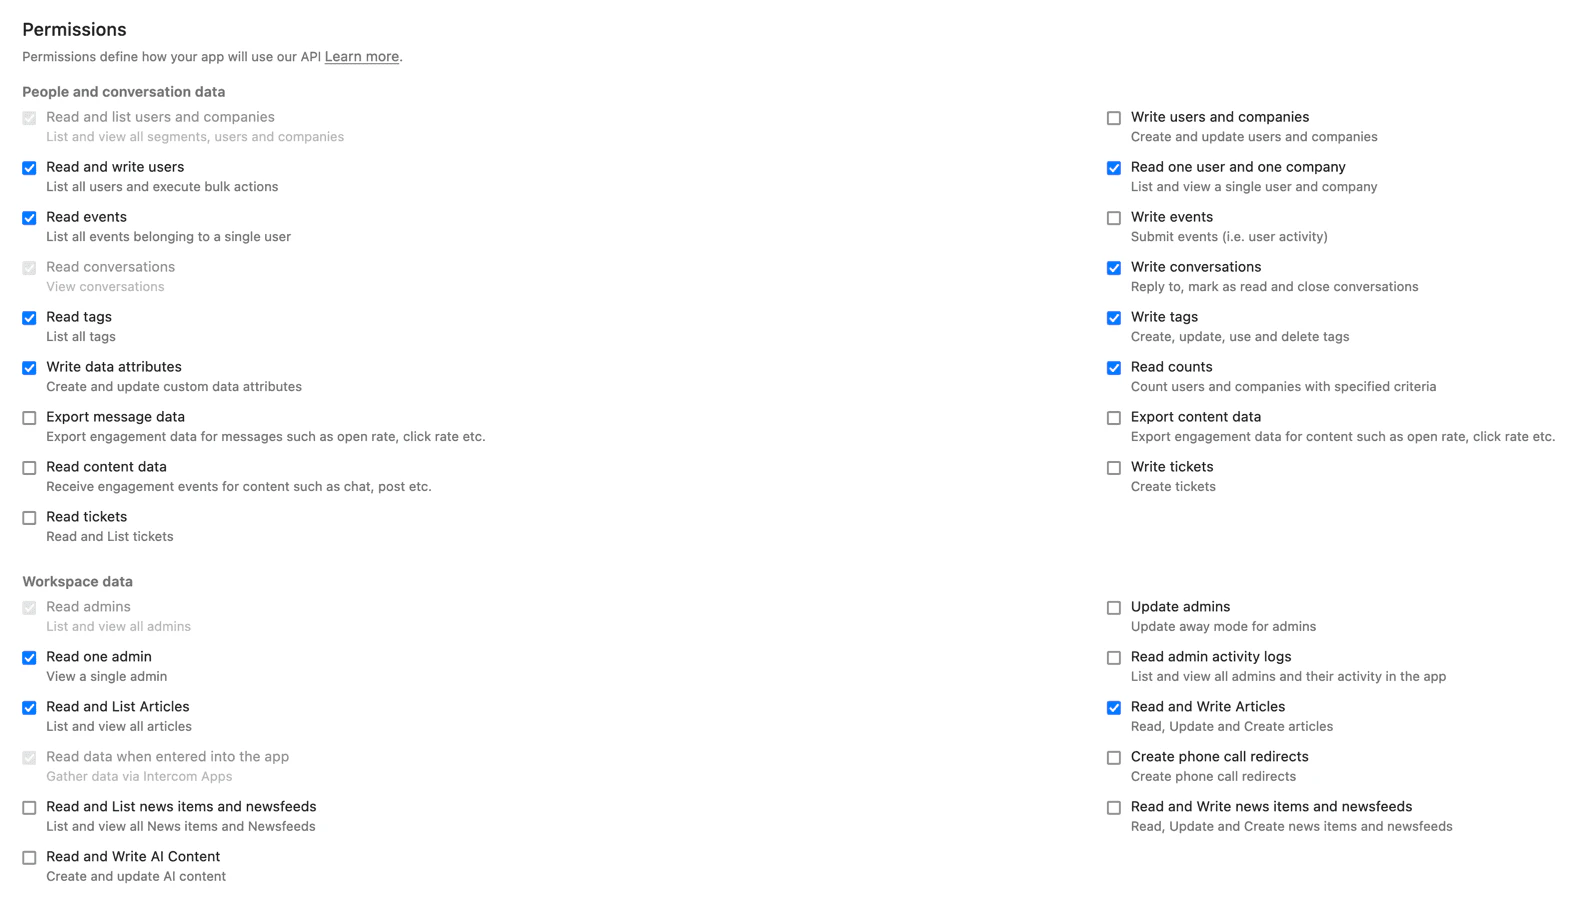
- Access the Authentication menu in your app settings.
-
Configure the necessary permissions as shown below.
Step 3: Configure Webhooks
-
Go to the
Webhooksmenu in your app settings. -
Ensure you set up the following required topics:
conversation.user.createdconversation.user.replied
-
Set the Endpoint URL to:
https://api1.irisagent.com/v1/webhooks/intercom/your_organization_id. Note thatyour_organization_idcan be found in the URL of the home page of your Intercom account as shown below:
https://app.intercom.com/a/apps/your_organization_id/home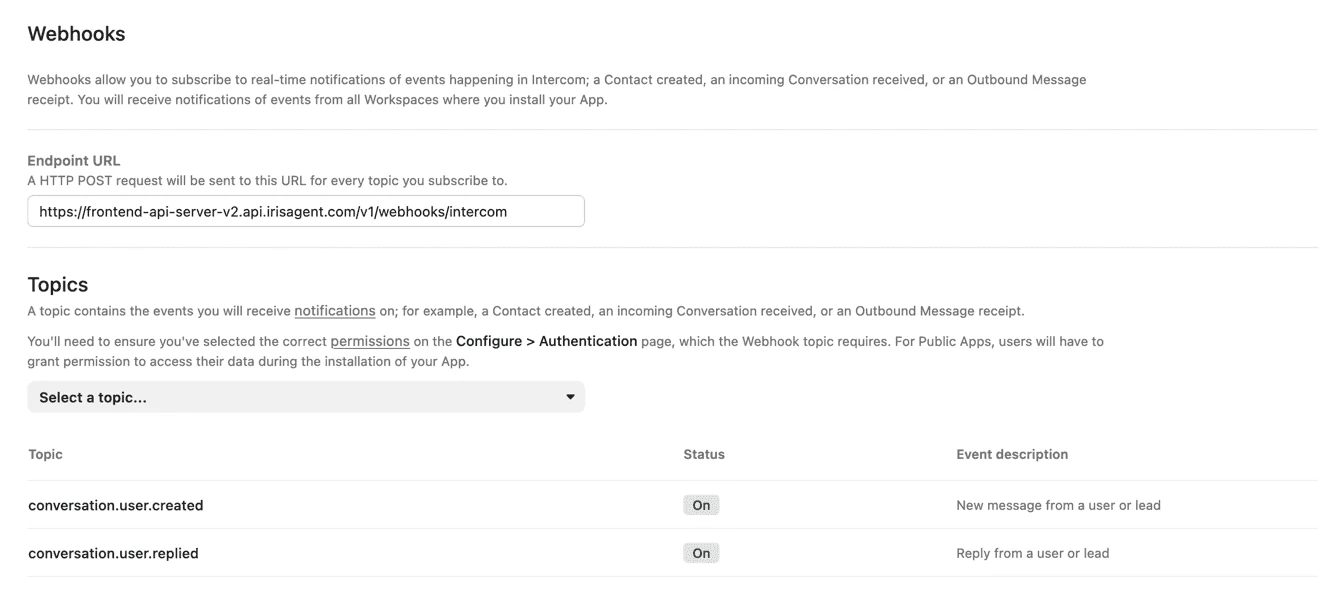
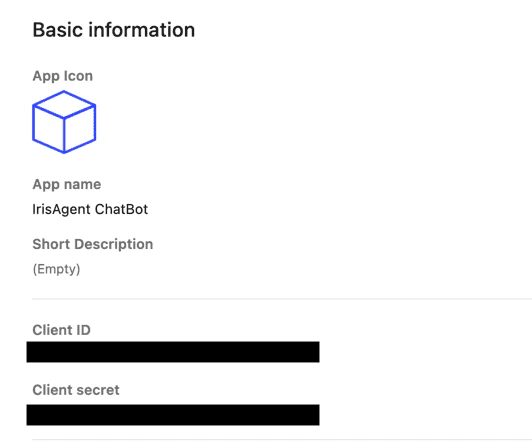
Step 4: Note Your ClientSecret and ClientID
-
Find these credentials under the
Basic informationmenu. -
The ClientSecret is vital for validating webhook requests from Intercom.
Step 5: Note the IrisAgent UserId
Select an author who should be used by IrisAgent to send automated messages. Note thisUser id that should be used as the author of IrisAgent AI comments. Your Intercom admin can get the user id for a given user from the Intercom dashboard by following the steps below:
- Navigate to Settings -> Teammates.
- Click on the name of the user whose id you want to get
- The URL of the page would look like
https://app.intercom.com/a/apps/intercom_id/admins/user_id. Share theuser_idat the end of the URL.
Step 6: Configure IrisAgent Integration
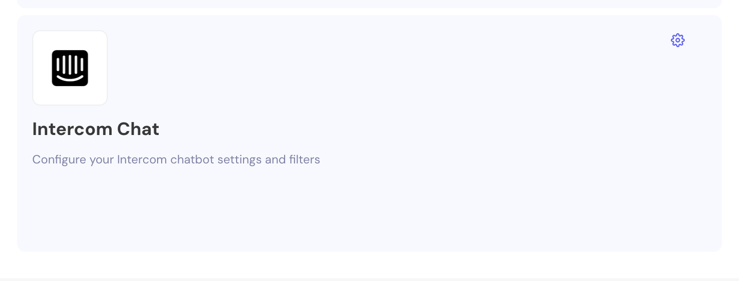
Configure the Intercom integration in your IrisAgent dashboard:- In the IrisAgent dashboard, open Deploy > Chat from the left sidebar, then find the Intercom Chat card and click the settings (gear) icon to open its configuration panel.
- Enter the
ClientSecretfrom Step 4. - Enter the
User IDfrom Step 5 that IrisAgent will use as the author for automated responses.